1. Making An Original Styrofoam Bear
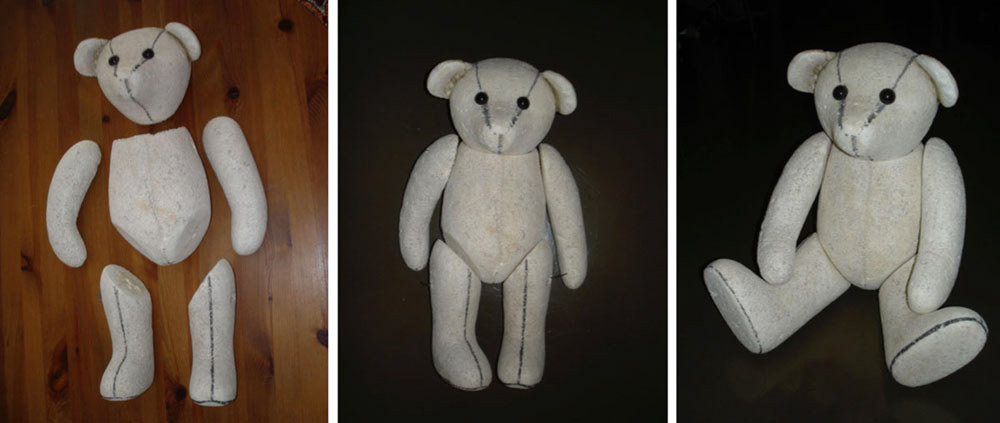
By using an electric foam cutter and a cutter blade, six parts of the teddy bear were carved from Styrofoam: a head, a body, right and left arms, and right and left legs. To make the surface of the Styrofoam pattern smooth, it was finished with sandpaper. In the photo below, the eyes are attached temporarily just for getting the final image.
(*An electric foam cutter is a simple tool to cut Styrofoam with a hot thin wire.)
2. Making Plaster Molds
1) Creating Joint Parts
On the each Styrofoam arm and leg, a plastic disc was glued on the joining spot to make a flat base, and then an appropriate size cylinder-shaped object such as a plastic bottle cap was glued to make a joint.
2) Making Plaster Molds
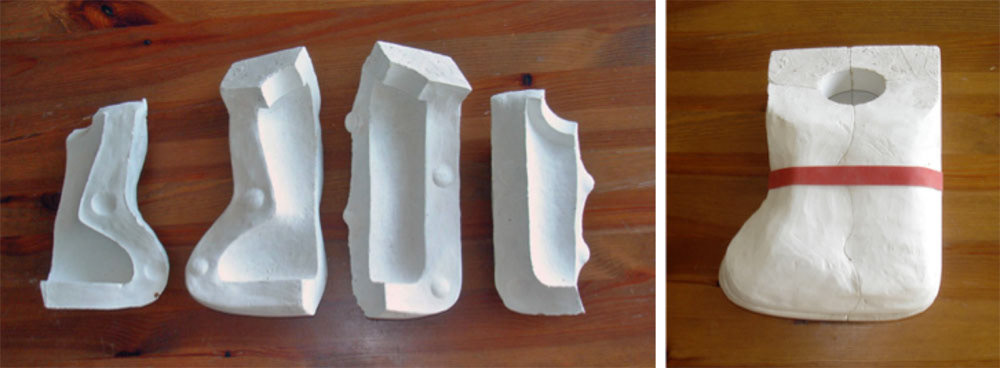
A plaster mold was made for each Styrofoam body part.
3. Creating A Wax Bear
1) Pouring Wax
Molten wax was poured into the molds. The wax patterns were needed to make hollow to reduce the weight when they were cast in metal, therefore, molten wax was dumped out when the thickness of the wax wall became approximately 1/4". The reason that the bear was cast in aluminum was also to make the weight lighter. Aluminum is about 1/3 weight of bronze.
2) Making The Wax Surface Completely Smooth
The surface of the wax pattern needs to be completely clean and smooth to get very fine lace pattern. Therefore seem lines from the mold and small bubbles on the wax pattern were filled, and the surface are scraped again. This process was repeated several times. Finally, mineral spirits were used to make the surface very smooth.
(The surface of the wax patterns in the photo below have not been completely cleaned yet.)
3) Cutting Holes Into The Body
Holes were cut into the wax body to make joints. The position of each hole was carefully determined to get a good balance.
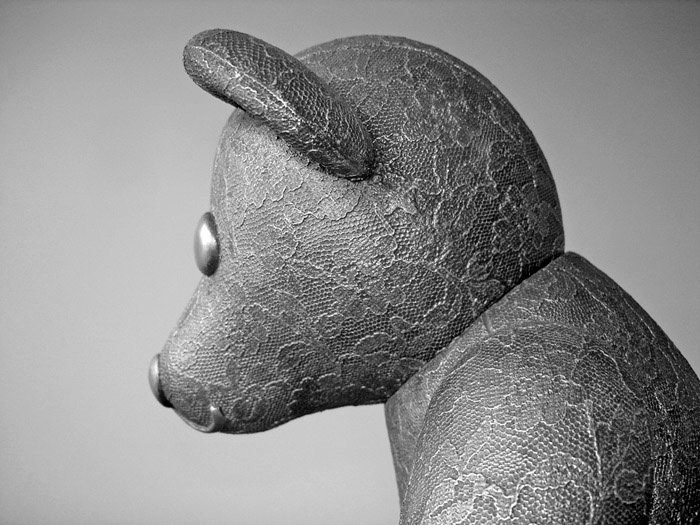
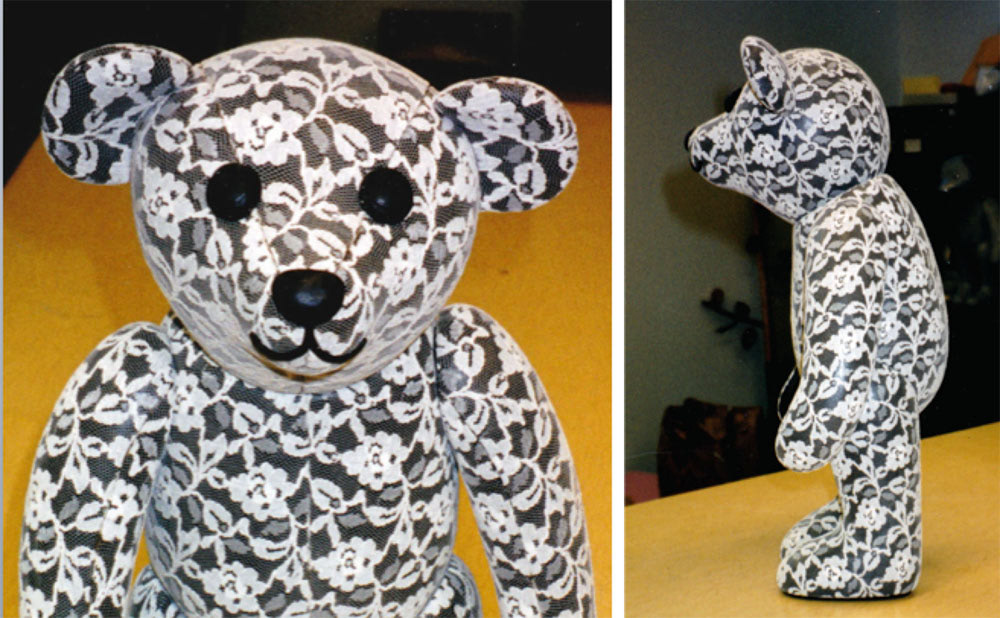
4. Stretching Elastic Lace Out On The Wax Patterns
An ordinary stuffed Teddy Bear has seam lines and the same lines were drawn on the wax pattern to divide the surface into sections. Elastic lace was cut according to the shape of each section, and the lace was stretched. The edge of the lace was pushed into the wax along the lines by using a small spatula. Eyes, a nose, and a mouth were made with wax and attached on the face. In the photo below, all the wax patterns have covered with lace and they are temporarily assembled to check the balance.
5. Making The Core Of The Wax Pattern
Since all the parts needed to cast hollow, the core of each wax pattern was made before making the resin bonded silica sand molds (sand mold).
Metal expands when it heats up, and shrinks when it cools down. This could cause cracks on the cast metal surface. To be compressive during the process of the shrinkage, 1% wood flour by weight was added in the silica sand to make the cores.
(In the photo below, the right brown "ball-like parts" sticking out from the wax legs are the part of the cores.)
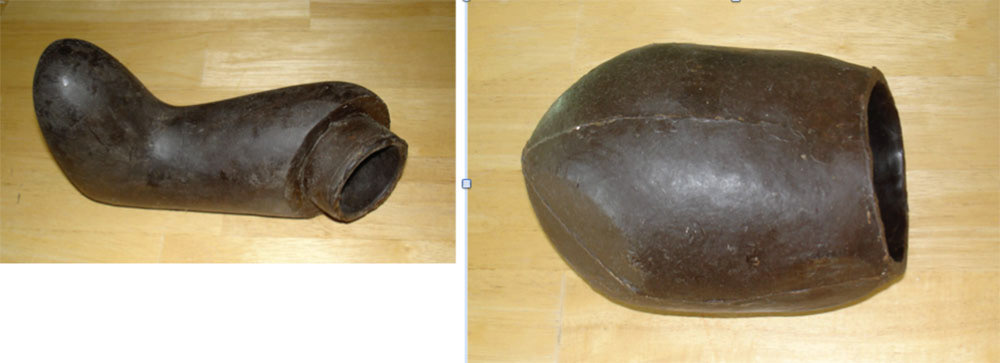
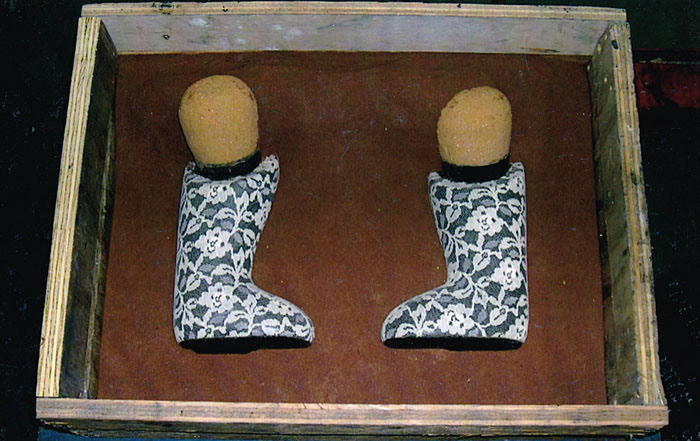
6. Making Piece Sand Molds For Casting
Sand molds were made for the wax patterns. Since the stretched lace needed to be removed from the mold before casting, piece molds were made. First, a bottom half of each wax pattern was buried in oil bonded green sand. (In the photo below, the radish bottom is the temporal/false mold made of green sand.) Then upper sand mold was made. It was turned over and the oil bonded green sand was completely removed. Then second half of the sand mold was made. In this process, the lace pattern was captured on the inner surface of the sand molds. Sprues and vents were made once the molds were completed.
7. Melting The Wax Out
The completed sand molds were put in a kiln to melt the wax out for casting. In the middle of this process, the molds were taken out from the kiln and opened to take the lace out.
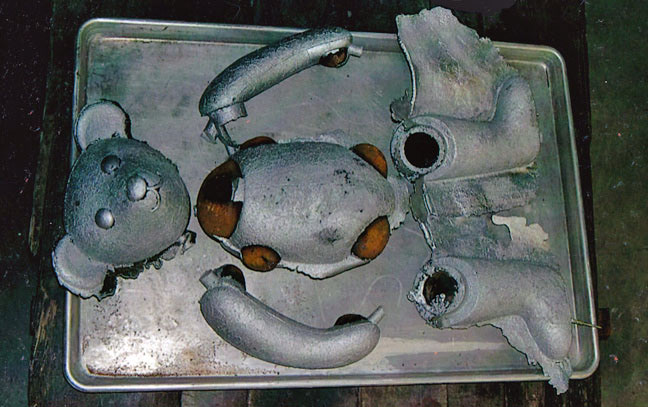
8. Casting in Aluminum
The molds were taken out from the kiln. To be ready for casting, they were bound tightly. Pouring cups were attached on them and molten aluminum was poured into the molds. In the photo below, cast parts were arranged in a bear form. Round brown round parts sticking out from the body are cores. The body looks like a TURTLE my professor Wayne Potratz loves. There is pretty much flashing on the legs.
9. Preparing for Assembling The Parts
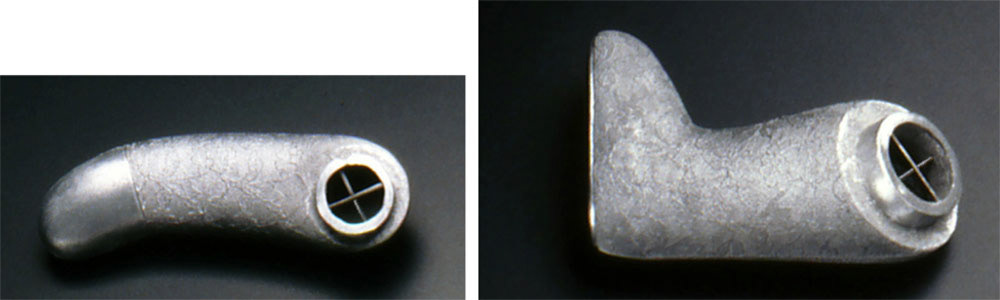
After casting, the sprues and vents were cut. The seam lines from the piece mold were completely ground and the lace pattern were reconstructed by the small electric grinder. For hooking a spring from the center of each joint, steel rods were welded in a cross shape inside of the arms and legs. One small hole was made on the bottom edge of the front side of the head to hook springs. Black enamel was sprayed on the cast aluminum surface. It was immediately wiped off to make the pattern clear. Now the parts are ready to be assembled.
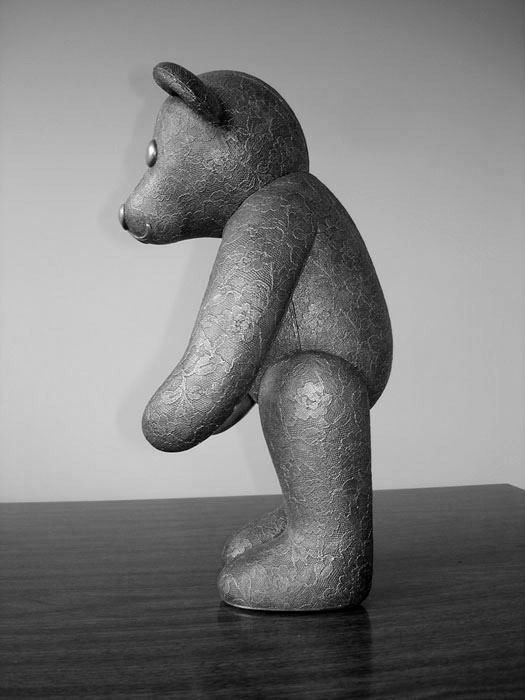
10. Completing The Bear
First, two arms were connected each other with springs inside of the body. Then each leg was connected to the bottm of the head with a spring. This step was very challenging. When all the parts were assembled, the metal bear was completed. She was named Lacy Lucy.